The Best Hiking Gear For Beginners (For Women) + What You Don’t Need
If you’re just starting out hiking there’s a lot to learn! From knowing how to be safe on the trail, to planning hiking routes and choosing the best hiking gear for beginners, it’s a mountain of information.
In this post I’m outlining the best hiking gear for newbies – as well as sharing my favorite budget items, and items which are a bit more expensive but will last a long time. The key to beginner hiking gear is knowing when to splurge and when to buy budget, so I’ll share what I’ve learned with you.
There’s a lot of beginner hiking equipment to choose from. I’m going to share which items are essential, and which items aren’t necessary immediately but may be nice to add in if you have room in your budget.
Disclaimer: This article features some affiliate links. I only endorse things I’ve personally used or that come highly recommended by trusted peers. If you purchase anything I mention using my referral links from Amazon, REI or other retailers I may receive a small commission. However, there is never extra cost to you. You can read more here. Thank you for your support.
The Best Hiking Gear For Beginners
Let’s dive into the right hiking gear for beginners! This section will include what to wear (and explain why) and provide budget friendly options as well as top quality “investment” pieces.
1. Merino Wool Socks (The Most Important Hiking Gear For Beginners)
There’s a reason I’m talking about socks first – they’re the most important! I can’t emphasize this enough– your feet are where you want to splurge. Get the right socks (and the right boots – more on that below) and you’ll be so glad you did.
Merino wool is the best material for hiking socks. You might be thinking – wool, even in the hot summer? And the answer is yes!
Wool is a magical hiking material because it’s thermoregulating which means it naturally cools your feet in the summer, and keeps them warm in the winter.
Merino wool is also moisture-wicking which will help to keep your feet dry (and prevent blisters!). Best of all, it’s odor resistant!
(Psst, Merino wool is so odor resistant that when I’m backpacking I will wear my socks multiple days in a row and they don’t stink! Like I said… magic!)


Budget Option: REI Co-Op Trailsmith Merino Wool Crew Socks
Top Quality Option: Darn Tough Crew Socks
Since we’re just talking about socks, there isn’t much of a price difference between really good quality socks or budget friendly ones. I think this is one category you should splurge and get Darn Tough socks.
Darn Tough are the only socks I wear hiking anymore. They’re about $20 per pair, and they come with a LIFETIME warranty. You can start with 1-2 pairs and add more as needed.
NOTE: Lifetime warranty actually means lifetime with this brand! I’ve known people who accidentally burned holes in their socks by drying them too close to the campfire (so admittedly it was their own fault) and Darn Tough still replaced them free of charge! This is such a wonderful company, I really can’t rave about them enough!
2. Base Layer Hiking Gear for Beginners
Base layers are crucial, especially for any winter hiking outfit. The purpose of a base layer is to wick moisture away from your skin.
Materials, like cotton, that hold moisture and stay wet against your body can cause hypothermia in the winter.
While they’re less crucial in the summer, having wet and sticky clothing during your hike is incredibly uncomfortable.
Ideal base layers are form fitting (they need to be in contact with your skin to work properly) and made from moisture-wicking materials like synthetic fabrics, wool or silk. Synthetic fabrics are the most budget friendly.
My summer hiking shirts are mostly synthetic and work well. However, for my winter base layers I like merino wool the best.
Base Layer Tops


Warm Weather: REI Co-Op Sahara T-Shirt
Cold Weather: REI Co-Op Long Sleeve Base Layer
Base Layer Bottoms

Cold Weather: REI Co-Op Merino Base Layer Bottoms
Base layer bottoms are really only important in cold weather. These Merino wool bottoms from REI Co-Op are really thin and fit well under your hiking pants in winter. I own two pairs and use them as my PJ’s on backpacking trips, too, since they pack down really small.
For warm weather hikes, I recommend a pair of leggings or hiking pants. I don’t like to hike in shorts unless it’s really hot, because having my legs exposed means more scratches from brush and more chances for issues with ticks and mosquitos.

3. Mid Layer
A mid layer is important for colder hikes, but less important if you’re hiking in warmer temperatures.
However, I recommend bringing a mid layer if you’re hiking at elevation, even in the summer, because the summit can get quite cold and chilly.
A fleece jacket is a great budget option for warmth. If you want something that’ll take up less space in your backpack, consider a jacket with synthetic insulation – it’ll be warmer and more compact.
I recently upgraded to the Patagonia Nano Puff jacket and love how cozy it is, and folds up to a fraction of the space my fleece used to occupy in my backpack.


Fleece: REI Co-Op Trailmade Fleece Jacket
Synthetic Insulation: Patagonia Nano Puff Jacket or with hood
4. Outer Layer Hiking Essentials For Beginners
An outer layer is necessary for hiking in any season. During the cold weather, it functions as a windshield to retain your body heat. In the warmer months it’s good for rainy weather.
Any waterproof coat will do here, you don’t need to buy something new if you already have a raincoat.

Outer Layer: REI Co-Op Rainier Rain Jacket
5. Best Beginner Hiking Shoes & Boots
There are a variety of decisions to make when it comes to picking the best hiking boots for beginners. The first choice is whether you want a hiking shoe or a hiking boot.
Hiking shoes are lighter weight, and tend to be cooler during the hot summer months. But they don’t provide much ankle support.
On the other hand, hiking boots tend to be more sturdy and comfortable. I recommend a hiking boot that covers your ankles for additional support (your knees will thank you), as well as added protection from things like sticks and snakes.
If you’re on a budget, I recommend buying hiking boots first. They work for all seasons and provide the most comfort and support. You can add hiking shoes later, as needed.
While I have a pair of hiking shoes and hiking boots, I tend to primarily use my hiking boots regardless of the weather – I just find them more comfortable.
Fit is also really important for hiking boots and shoes. I buy my hiking boots one full size larger than my every day shoes. You want to make sure you have enough space to wear thick socks, and anticipate that your feet will swell a little while hiking. If your boots are too small you’ll be very uncomfortable and be more prone to blisters.


Hiking Shoe: Merrell Moab 3 Hiking Shoes
Hiking Boot: Danner Inquire Mid Hiking Boots
Hiking boots is another category where I recommend you spend a little more and get a high quality boot.
If your feet are sore, hiking is miserable. I’m completely in love with my Danner boots. They are comfortable right out of the box (no break-in period!) and after hundreds of miles they’re still in great shape.

Hiking Essentials For Beginners
Now that we’ve got hiking apparel covered, let’s discuss the beginner hiking equipment you’ll need. There are a few non-negotiables! A backpack, and the 10 essentials. But don’t worry! I’m also going to include some nice-to-have items, too.
6. Hiking Backpacks For Beginner Hikers
Hiking backpacks, sometimes referred to as daypacks, are measured in liters. For day hiking, I recommend a backpack between 20 and 30 liters (but personally, I think 20-22 liters is the sweet spot). Anything smaller and you won’t have space for all your hiking gear, and anything bigger will be unnecessary cost and weight.
Additionally, some daypacks come with an internal pocket to hold a water reservoir. Personally, I prefer having a water reservoir (or bladder) because it makes staying hydrated much easier. They come with a hose which clips onto your shoulder strap so you can sip as you hike without having to stop and pull out a water bottle.
Whether you choose to have a reservoir or not is a personal preference. If it’s something you want to incorporate into your hiking gear then make sure you buy a backpack with a hydration reservoir pocket.
Additionally, you’ll have to decide if you want hip belts on your daypack. For hiking shorter distances (under 10 miles) this isn’t as crucial. However, if you plan to hike longer trails, or full day hikes, then I recommend having hip belts. They help move the weight of your backpack from your back to your hips, which makes it more comfortable to hike longer distances.
Personally, I recommend buying a 20-22 liter backpack with a hydration reservoir and hip belts. That way, you have one item that’ll work for all your hikes and you won’t need to buy more gear later on.


Budget Option: CamelBak Rim Runner X20 Hydration Pack
Top Quality Option: Gregory Maya 20 Pack
7. The 10 Hiking Essentials For Beginners
There are 10 essentials you must have for every hike. These are items intended to keep you safe and prepared in case of an emergency. This list is just the basic hiking gear for beginners, but you may also want to add a few items geared towards comfort as well.
- Navigation: paper map, compass, GPS device, or satellite phone (iPhone 14 and newer have satellite capabilities)
- Headlamp: plus extra batteries. Please do not rely on your phone flashlight!
- Sun protection: sunglasses, sun-protective clothes and/or sunscreen
- First aid: including blister patches and alcohol wipes
- Knife: that is easily accessible (I carry a pocket knife in my hip belt)
- Fire: matches, lighter, and/or stove
- Shelter: like a lightweight emergency bivy or blanket
- Extra food: more than you expect to eat
- Extra water: more than you expect to drink
- Extra clothes: including layers in case it gets cold, or you need to emergency camp overnight
While it’s not technically included on the list of 10 essentials, I would also highly recommend getting a Lifestraw. This is a small device that will filter water from any source so you can drink it. It takes up almost no space or weight in your backpack but it comes in really handy in a pinch.
I have carried a Lifestraw in my backpack (where it lives permanently) for years and never needed it… until this spring when I ran out of water in the Grand Canyon and my primary water filtration system for backpacking failed.
8. Portable Charger Hiking Gear For Beginners
A portable charger is not always necessary, especially on shorter hikes or in well-populated trails. But, if you’re hiking in more remote areas (where there’s an increased risk of getting lost) or on longer day hikes when you may need to recharge your phone these come in really handy!
It’s also worth noting that batteries die faster in colder weather, so if you’ll be hiking in winter you should anticipate that your phone charge will not last as long.
If, like me, you use your phone for navigation (I love the AllTrails app) the GPS tracking will drain your battery faster than normal. If your phone is your navigation device you must have a backup way to charge it in case it goes dead on your hike.
There are a lot of expensive portable battery banks out there. However, I really like this one by Anker. It’s slim enough to fit into my pocket, similar in weight to the pricy brands, and can charge my phone 4+ times.

Power Bank: Anker Portable Charger, Power Bank, 10,000 mAh Battery Pack
9. Trekking Poles
Trekking poles are not essential beginner hiking equipment, but they make a huge difference in rocky or rough terrain, steep inclines or declines and help prevent knee pain by removing load from your legs to your arms.
When I first started hiking I did not have trekking poles and I was completely fine. Later, I was gifted some and wowwwwwie! what a difference they make. I had no clue what I was missing! I feel way more stable while hiking with poles (4 points of contact vs 2), which also means I can hike faster. Not to mention they are a game changer for backpacking with heavy weight.


Budget Option: Trailbuddy Trekking Poles
Top Quality Option: Black Diamond Trail Trekking Poles
I have the Trailbuddy trekking poles. They’ve very affordable on amazon. I really like that they collapse down, which makes them easy to store or travel with. If you’re just starting out, I recommend these.
If you’re looking to splurge, the Black Diamond poles are top of the line. I borrowed these from a friend once and was really impressed with how comfortable the hand grips are, and how strong they are for being so light.
10. Water Reservoir
A water reservoir is another highly optional piece of hiking gear for beginners. You will be absolutely ok without one – I was for years! But, they’re fairly inexpensive and make it much easier to stay hydrated while hiking because you can sip as you walk. I wish I’d added this to my hiking gear earlier.
They come in 1 to 3 liters. While 3 liters may be more water than you need for shorter hikes, I would still recommend sizing up. You can under fill the reservoir and only bring what you need while still having more capacity for longer trips. That way one piece of gear will fit all your needs. There’s no need to buy them in multiple sizes!

Water Reservoir: CamelBak Crux 3L Reservoir – 3 Liters
Hiking Gear List For Beginners
Here’s an easy checklist to keep you organized for your next hike!
Clothing
- Base Layer (for wicking moisture)
- Mid Layer (for warmth)
- Outer Layer (for wind and water)
Footwear
- Merino Wool Socks
- Hiking boots (that you’ve already broken in)
Gear
- Backpack
- AllTrails App
- Portable Charger
- Trekking Poles
- Water bottle / reservoir
- Snacks
Warm Weather
- Sunblock
- Wide-brimmed sun hat
- Bug spray
- Sunglasses
Cold Weather
- Beanie / ear muffs
- Gloves
- Hand warmers
- Sunglasses
10 Essentials
- First Aid (including blister pads)
- Navigation (compass, GPS, map)
- Headlamp
- Sun protection
- Knife
- Fire starter (stove, matches)
- Shelter (emergency blanket works well)
- Extra food, water & clothes
Preparations
- Tell a friend where you’re going, route details, and expected return time
- Have a printed map, just in case your phone battery dies
- Emergency itinerary left in the drivers wheel well of your car (face-down)
Tips: Hiking For Beginners
I strongly believe that anyone who wants to spend time outdoors should! But if you didn’t grow up in an outdoorsy house, and you don’t have outdoorsy friends to teach you the tricks and tips it can be very intimidating. I’ve been there.
My biggest piece of advice is to start slowly. You can go for short hikes in areas you know well, and are popular spots where you know there will be others around in case you need help. Pretty soon you’ll be confident enough to try longer hikes, and then even longer hikes.
Hiking For Beginners: Route Planning
Planning your hiking routes can be intimidating at first. I highly recommend using Alltrails.
Alltrails has a phone app as well as a desktop version. They’re both really easy to use. You can search for hiking trails nearby, and then filter based on what you’d like to do – for example, dog-friendly hikes, epic views, wildflowers, lakes and waterfalls.
The best feature about Alltrails, in my opinion, are the user reviews. You can see reviews by others below the trail details. These are always super helpful in understanding the current conditions of the trail – if it’s muddy, has a lot of mosquitos, and suggestions for where to park or what time is best for the views.
All of this is free with Alltrails. However, they also have a pro version (which I’ve had for several years and love) that allows you to download the map to your phone. This, in my opinion, is worth the cost! – About $3 per month.
Since hiking trails are notorious for poor cell coverage, your app won’t work offline. But, if you’ve downloaded the map you’ll still be able to access it. I really love the off-route feature, which sends me an alert and dings if my phone realizes I’m not on the marked trail.
Have An Emergency Plan
There are two parts to every emergency plan.
First, tell a friend or family member where you are going, specific information about the trail, when you plan to start your hike and (most importantly) when you expect to complete your hike and check back in with them.
Second, leave a written itinerary in the footwell of your drivers seat when you park at the trailhead. This is where rangers or search & rescue will look for your details. I always write down my full name, age, trail information and relevant date and times. Leave this *face down* so not everyone can see it, it’s just there in case of emergency.
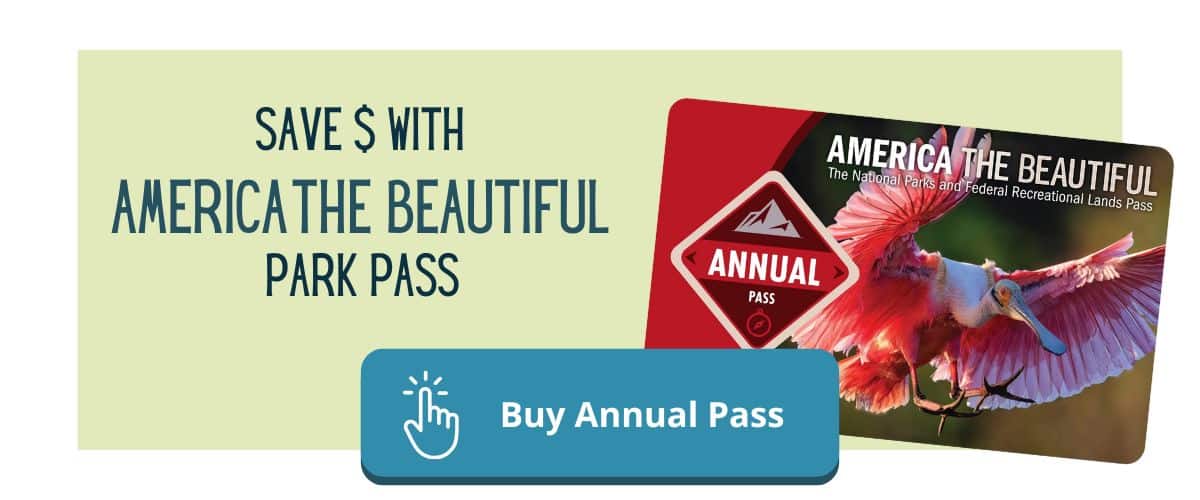
America The Beautiful National Parks Pass
If you’re planning to hike in National Parks, I recommend the America The Beautiful National Parks Pass.
Most National Parks charge an entry fee between $30-35. This can add up over the course of a year.
The annual pass is $80, good for 12 months, and will get you into any National Park or any of the 400+ recreation sites. I’ve had it for a few years and it’s saved me a ton of money.
REI Re/Supply & REI Co-Op Sales
It’s possible to find budget hiking gear for beginners on the REI RE/Supply website. I’ve found a couple of awesome deals here. They sell used gear so the products are constantly changing.
I really like how detailed each description is, so you know exactly the condition of the product you’re buying. Surprisingly, there’s many items which are almost brand new and steeply discounted.
Another good option for the more expensive hiking gear for beginners is to purchase during one of the REI Co-Op Sales. REI is a store owned by its members. For $30 (one-time fee) you can become a Co-Op member, which means you earn 10% back on every purchase you make, and you get access to big sales discounts.
I usually wait to buy expensive gear during their anniversary sale in the spring. Each Co-Op member gets a coupon for 20% off one full price item.
Hiking For Beginners: Prioritize Your Feet!
Your feet are the most important part about hiking. It’s so important to make sure the socks and boots you wear are top quality and fit correctly for your foot.
You can get budget items in every other category if you’re starting out with hiking gear for beginners, but your feet should be where you upgrade your gear first. Nothing is more miserable than hiking in shoes that are causing blisters or not supporting your knees and hips properly.
Bring The Right Food
Packing the right food to fuel your hike is just as important as the right hiking gear for beginners. I recommend snacks that are easy to pack, don’t require refrigeration, and have a lot of protein.
Read my complete list of day hiking food ideas here.
Hiking For Beginners Training & Workouts
Training for hikes doesn’t need to be intimidating. There are a few small things you can start with to grow your strength and endurance.
There are 4 areas to focus on: strength, endurance, and balance.
For strength, focus on your legs. Climbing stairs, doing squats and lunges are great ways to build your leg muscles. Try doing these 3-5 times per week. Start with just your body weight and add more weight when you can complete 15 reps 3x easily.
- Squats (3 sets of 12-15 reps): Traditional or goblet squats using a dumbbell or kettlebell for added weight.
- Lunges (3 sets of 12 reps per leg): Walking lunges or static lunges; you can add weights for more intensity.
- Step-Ups (3 sets of 12 reps per leg): Using a bench or step, mimic uphill movements. You can hold weights for added difficulty.
You can work on endurance by steadily increasing your cardio workouts.
- Stair Climbing or Incline Treadmill Walking: Aim for 20-30 minutes at a challenging pace to simulate uphill hiking.
- HIIT Workouts: Short, high-intensity sessions like 30-second sprints followed by 1-minute rest intervals for 15-20 minutes.
Balance is really important while hiking because you’ll be on uneven, sloped surfaces, and hoping across rocks and tree roots. These are a few great exercises for increasing your balance – aim to do these 2-3 times per week.
- Single-Leg Deadlifts (3 sets of 10 reps per leg): Great for strengthening your hamstrings and improving balance.
- Standing Calf Raises (3 sets of 15 reps): Strengthens calves and ankles, which are crucial for stability.
- Hip Flexor Stretches and Ankle Mobility Work: Helps with range of motion, making uphill and downhill sections easier.
Choosing The Right Hiking Gear For Beginners
Even though the outdoors is a (mostly) free hobby, it can be quite expensive to build up your closet with hiking gear for beginners.
Hiking during the warmer months is much more affordable as you need less equipment, and summer weather items tend to be less expensive. If you’re starting out on a budget, I recommend planning your outdoor time around good weather to keep costs down.
Winter hiking gear for beginners can start to get pricy. You need more items, and they tend to be fairly expensive. Good base layers and a mid layer can cost a few hundred dollars. For getting started with winter hiking I highly recommend shopping RE RE/Supply and finding sale discounts to get you started.
While the initial cost of hiking can be expensive, the silver lining is that quality hiking gear will last years (or decades) so you won’t have to invest as much over the years.


Greetings! I’ve been reading your blog for some time now and finally got the
courage to go ahead and give you a shout out from Huffman Texas!
Just wanted to mention keep up the good work!
Thanks Glenna from Texas (using an IP from California)! I’ve removed your website for privacy reasons, and because this isn’t a forum for backlinks. Have a great day!