37 Best Going To The Sun Road Stops You Must See
If you are planning to trip to Glacier National Park you must add these 37 Going To The Sun Road stops to your itinerary!
I travel full-time and live in my camper van, and this road trip is the most beautiful one I’ve seen in the United States. It was my favorite part about my visit to Glacier National Park.
I got a very early start (before sunrise) on GTTSR and it almost entirely to myself! It was incredible to watch the sun rise up over the mountains and enjoy the solitude – which is short lived because this is one of the most popular attractions in Glacier National Park.
In this article I’ll cover:
- The best stops on Going To The Sun Road
- Downloadable map (also includes bathrooms!)
- Managing crowds & parking
- Tips for driving Going To The Sun Road
Disclaimer: This article features some affiliate links. I only endorse things I’ve personally used or that come highly recommended by trusted peers. If you purchase anything I mention using my referral links from Amazon, REI or other retailers I may receive a small commission. However, there is never extra cost to you. You can read more here. Thank you for your support.
⚠️ Important Note ⚠️
Glacier National Park requires all visitors to have a timed entry vehicle reservation to drive Going-to-the-Sun Road and enter most areas of the park during the summer months.
Read more about Going-To-The-Sun road tickets.
Overview: Going-To-The-Sun Road Stops
Distance: 52 miles
Drive time: 2 hours minimum
Elevation: Highest peak 6,647 feet
Open Dates: Late June – Mid October (varies by year)
Vehicle restrictions: may not exceed 21 feet long, 10 feet tall or 8 feet wide
Going-To-The-Sun road is a 52 mile long road which connects the West and East sides of Glacier National Park. Without stops, it takes about 2 hours to drive (but I recommend allowing yourself at least 4 hours if not an entire day).
Be sure to download this Self-Guided Driving Tour ahead of your trip. It’s about $20, and will automatically share location information along the road based on your GPS location. It gives you details about what’s coming up so you’re prepared on your drive, and know when you should be ready to pull-off.
The road follows the mountain range, with its highest point (Logan Pass) at 6,647 feet elevation – that’s more than a mile above sea level!
As you can imagine, it can get quite cold and snowy along the route, even well into the summer months. This is why Going-To-The-Sun road is not open during the winter, and why it takes weeks for crews to clear the snow each summer.
I recommend being prepared with proper winter hiking gear – even if you’re traveling during the summer! Temperatures at elevation remain chilly year-round.
The road is narrow with some very tight turns and rock overhangs that limit the size of vehicles which can safely drive on the road. Vehicles should not exceed 21 feet in length, 10 feet in height or 8 feet in width.
Many people will fold in their rear view mirrors because they exceed the 8 foot restriction. Even if your vehicle isn’t 8 feet wide I would still recommend folding in your mirrors – in my experience there are some nervous drivers on this road who like to straddle the line in more challenging sections.
Going To The Sun Road Opening 2025
While the specific dates for Going To The Sun Road opening 2025 have not yet been released, it’s a safe assumption (based on previous years) that the road will open at the end of June (typically between June 22-28) and remain open until early October (typically October 9-15).
When Going To The Sun Road opens is hard to predict because it’s impacted by weather conditions. The more snowfall or spring avalanches the park has, the longer it will take to clear the road of snow before it can be opened and safely driven.
More than 80 feet of snow has been recorded on Going To The Sun road. I cannot even imagine what that much snow looks like!
For this reason, it can take up to two months, or longer, for the road crew to remove the snow.
In the past, these are the dates when Going To The Sun Road opened:
2017: June 28 – October 9
2018: June 22 – September 29
2019: June 22 – September 25
2020: July 13 – October 9 (delayed opening due to pandemic)
2021: June 25 – October 13
2022: July 13 – October 16 (delayed due to historic snowfall and avalanches)
2023: June 13 – October 16
2024: June 22 – October 20
2025: Dates not yet released
Going To The Sun Road Map
This Going To The Sun road map will help you get acquainted with the stops along the route.
Additionally, I have found that the park visitor guide (which looks like a newspaper) is an incredibly helpful resource – and best of all they’re free at the visitors center. I recommend grabbing one upon arrival at Glacier National Park. Among the many helpful items in this guide is a great map of Glacier National Park.
For more tips on how to avoid the crowds and maximize your time in the park check out my itinerary for Glacier National Park.
Use this custom Going To The Sun Road map to plan your itinerary for Glacier National Park! I’ve labeled items by activity type (noted by icon) and added the restrooms along the route as well.
How To Use This Map:
Open this map in your browser by clicking the icon in the top right corner. Then click the star icon on the left-side bar. This will save the map to the Google Maps app on your phone so you can easily reference it during your trip.
Locate this map in your Google Maps app by selecting ‘you’ at the bottom of the phone app and then scroll down and click ‘maps’ to find saved trip maps like this one.
Looking for additional things to do within the park?
Don’t forget to check out my curated 3 days in Glacier National Park itinerary, Guide to Hiking Grinnell Glacier and 21 Best Waterfall hikes to do in Glacier!
37 Must-See Stops Along Going To The Sun Road
If you’re driving Going-To-The-Sun road from West to East (recommended) then your first stop will be West Glacier Village. West Glacier is an unincorporated town with a population of only 221 people.
Since most visitors will enter the park on the west side and travel east, this list of stops along Going To The Sun Road follows this route. You can reverse this list if you’re traveling from east to west.
Note: For the purposes of mileage, the intersection between Route 2, in West Glacier, and Route 1 (Going-To-The-Sun road) will be mile 0. If you’re navigating to these directions I recommend setting your trip odometer at this point so your mileage will match the mileage listed for these stops along Going To The Sun road.
1. Glacier National Park Welcome sign
Mile Marker: 0.4
Every trip I take to a National Park has to start with an obligatory photo with the parks welcome sign! The Glacier National Park sign is on the right side of the road before you pass the West Entrance gate.

2. West Entrance
Mile Marker: 1
This is less of a “can’t-miss” and more of a “required to enter” stop! Entrance to Glacier National Park requires a park admission ticket all year, and a timed-entry ticket during specific months in the summer.
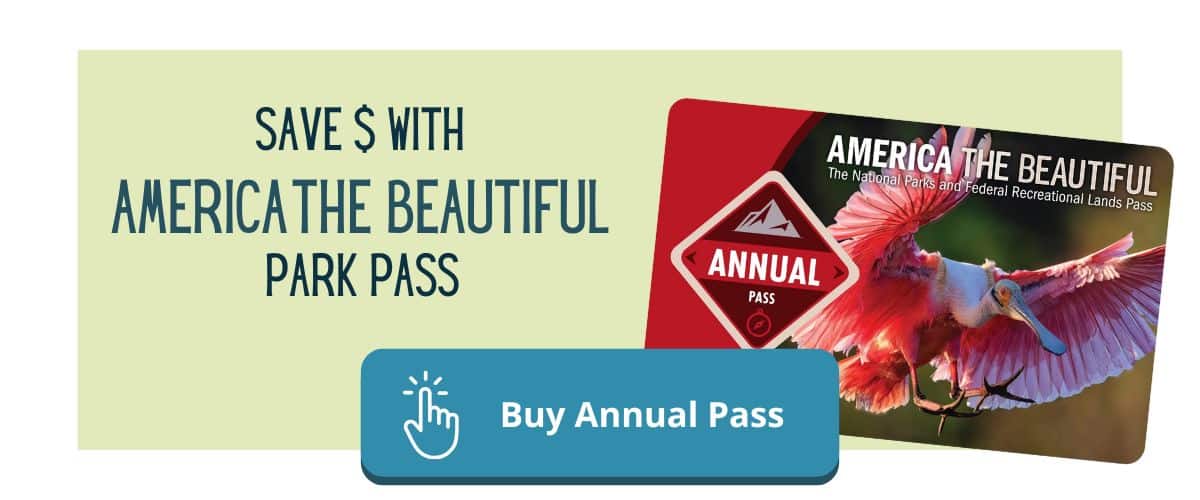
Park admission is $35 per vehicle, good for 7 consecutive days. You can also purchase an annual pass for the park for $70.
In my opinion, if you’re visiting 2+ National Parks in a 12-month period it makes more sense to purchase the America The Beautiful pass for $80. It will get you into every National Park (and 2000+ federal recreation sites) for the whole year.
I’ve held an America The Beautiful park pass for the last few years. Not only does it save me money, but some parks also offer an “express lane” for pass holders (like Glacier, Grand Canyon, Rocky Mountain and Yellowstone, just to name a few) which can save you a lot of time – the lines can be over 2 hours long during the peak season.
3. Apgar Village
Mile Marker: 2.2
Apgar Village is actually a slight detour. Take a left onto Camas road after you pass through the park entrance. About a quarter mile later you’re in the cute little village of Apgar.
If you’re getting a really early start before sunrise there’s not a whole lot here to see or do, but if you’re beginning your drive later in the morning this is a great spot to see Lake McDonald and grab a coffee.
Pro Tip: Visit Glacier Outfitters and rent bear spray. You can’t fly with bear spray, so you’ll need to buy it or rent it for your hikes in Glacier National Park.
4. Apgar Visitor Center
Mile Marker: 2.2
The Apgar Visitor Center is a good spot to stop and orient yourself with the park. There are rangers on duty who can help answer any questions you might have.
It’s also good to check which trails are currently closed (usually due to recent bear activity or construction). Check the sign at the entrance for the most recent trail updates, or speak with a ranger.
While you’re here grab a free park guide – they include a detailed map of the park which will be useful because there isn’t any cell service along Going To The Sun Road (or most areas within the park).
And if you’re like me and collect National Park stamps (I’ve been doing this since I was 12!) you can get your passport stamped outside the visitor center.
If you’re just starting your collection be sure to get your National Parks Passport before your trip!

5. Lake McDonald
Mile Marker: 5.8
After you leave Apgar, Going To The Sun road follows the Eastern shoreline of Lake McDonald for several miles.
Lake McDonald is the largest lake in Glacier National Park.
There are several pull-offs, mostly on the opposite side of the road, where you can park, stretch your legs, and walk along the lake.

6. Lake McDonald Lodge
Mile Marker: 11
Even if you don’t have reservations at Lake McDonald Lodge you can still explore the grounds! The dock, located behind the lodge, has a great view of the lake.
While you’re here you can rent SUPs, kayaks, canoes or even take a boat tour. There’s also a coffee shop located next to the parking lot, and several restaurant options for meals or grab-and-go.
7. Johns Lake Loop
Mile Marker: 12.3
Johns Lake Loop is an easy 2 mile hike that takes you around Johns Lake, then up to McDonald Creek and McDonald Falls, one of the many waterfalls in Glacier National Park.
With a very short detour you’ll also be able to see Sacred Dancing Cascade on this hike.
8. McDonald Falls
Mile Marker: 12.6
If you don’t opt for hiking Johns Lake Loop you can still check out McDonald Falls and Sacred Dancing Cascade.
Going To The Sun road runs parallel to McDonald Creek, which is where both of these waterfalls are located. There’s a few turnouts along the road where you can park and walk down to the creek.
9. Sacred Dancing Cascade
Mile Marker: 13.1
Sacred Dancing Cascade is one of the best waterfalls in Glacier National Park. It’s a charming cascade located along Going To The Sun road.
Park in the pull-off and follow a short trail on the left side of the parking lot to a bridge. After you cross McDonald Creek, take a right to follow Upper McDonald Creek trail up the creek slightly before arriving at Sacred Dancing Cascade.

10. Avalanche Lake Trail
Mile Marker: 16.5
Avalanche Lake Trail is a can’t miss hike in Glacier National Park. It’s a 6-mile round trip trail that leads to a beautiful turquoise lake in a serene setting with a backdrop of waterfalls.
With under 800 feet in elevation gain this is a moderate hike that anyone in moderate shape can accomplish.

11. The Trail of the Cedars
Mile Marker: 16.5
Immediately next to Avalanche Lake Trail is Trail of the Cedars, which is another must-see Going To The Sun road stop. In fact, you have to take a portion of Trail of the Cedars to get to the trailhead for Avalanche Lake Trail.
In my experience, parking can be tricky here. I had to arrive before 8am in order to find one of the last spots in the parking lot.
Luckily, there’s a few small lots in this general area so I recommend circling around the area and checking out the other parking areas.
12. West Tunnel, Going To The Sun Road Stop
Mile Marker: 23.6
West Tunnel is the first of two tunnels you’ll pass through while driving GTS road.
It’s actually incredible when you think that this was built without many explosives or power tools.
Get ready, because right after you pass through the tunnel you’ll come to The Loop – which most people are either excited or nervous about.

13. The Loop, Going To The Sun Road Stop
Mile Marker: 24.1
The Loop is a hairpin turn and one of the primary reasons for vehicle size restrictions on Going-To-The-Sun road.
Due to the switchback, the panoramic view along this section of the road is stunning. To the South is Heavens Peak, an 8987-foot peak frequently covered with snow.
This is also the start of Loop Trail, a popular hike that connects with Granite Park Chalet and the Highline Trail.
Because some day hikes and backpacking trips in Glacier start from this small parking lot, parking can be tricky unless you’re arriving very early.
Up until this point I would consider Going To The Sun road as a modest drive.
Buckle up because the section between The Loop and Logan Pass is epic. This part of Going To The Sun road is referred to as the Alpine section, or Garden Wall section.
14. Bird Woman Falls Overlook on Going To The Sun Road
Mile Marker: 26.9
Bird Woman Falls is a popular waterfall in Glacier National Park, but it isn’t one you can walk to. It’s only viewable from the Going To The Sun road stop.
Unfortunately, Eastbound traffic is heading in the wrong direction to be able to get a good look at this waterfall from the car so I highly recommend parking in one of the pull-offs along the road.
Pro Tip: Parking can get crowded so as you’re approaching mile 26 take any parking space you can find – you’ll be able to see the waterfall off in the distance from any of them.

15. Haystack Falls
Mile Marker: 27.2
Haystack Falls is another waterfall only visible from Going To The Sun Road. In fact, you’ll drive right over it!
Eastbound traffic is the best way to see this waterfall, as you approach the falls head-on before the road bends and drives directly over the falls.
As soon as you’ve left the Bird Woman Falls overlook, turn your eyes forward and you’ll see Haystack Falls tumbling down the mountain.
Going To The Sun road was built with these waterfalls in mind, and a bridge was constructed to preserve the natural beauty along the road.
16. Weeping Wall – Going-To-The-Sun Road
Mile Marker: 28.9
Weeping Wall is a natural water feature with cascading waters that fall directly onto Going To The Sun road.
Eastbound drivers will be in the opposite lane, but Westbound drivers stand a good chance of getting sprayed from the falls and they drive directly under it.
There is nowhere to park at Weeping Wall but slightly up the road near Big Bend is a large pull off where you can still view Weeping Wall from.
The road is very narrow in this section so please do not pull over, stop your car, or attempt to walk around this area – you’re putting yourself and others at risk.

17. Big Bend
Mile Marker: 29.1
Big Bend is one of the most photographed sections of Going To The Sun road, and for good reason. The views are unbelievable. Trust me when I tell you the photos don’t do it justice – this is one spot you absolutely have to park and spend a few minutes soaking it in.
Luckily, the parking area here is one of the largest pull-offs along Going To The Sun road… and there are restrooms!
If you got a really early morning start to driving Going To The Sun road this is one of the best spots in Glacier National Park for sunrise, and I highly recommend trying to time your trip so you can relax here while the sun lights up the valley.
Plan for 1-hour of drive time from West Glacier to Big Bend. Even though it’s less than 30-miles, mountain miles are much slower to drive than highway miles.
If you’ll be making other stops you need to factor those in too! Personally, I would arrive 20+ minutes before sunrise to ensure you get a good parking spot, and also because sunrise in the mountains is a bit less predictable and you don’t want to miss it!

18. Triple Arches
Mile Marker: 30.1
Triple Arches is another impressive engineering feature along Going To The Sun road, and it’s best viewed by Eastbound traffic. The curve leading into the arches allows you to see the bridge head-on before curving to the right and heading straight over it.
What I find the most fascinating about this feature is that, again, it was designed to work with the existing mountainside instead of using explosives to cut out a roadway.
If you look closely, you’ll see that each of the arches bases sits atop a section of mountain which juts away from the mountainside.
There was no flat surface to construct a roadway along, so the road engineers literally skipped across a major gap with a few archway pillars and laid a roadway over it.
This is fascinating to me based on current-day construction methods, but it absolutely blows my mind to think that this technology was used in the early 1900’s and was built with so much precision that it still stands a century later.
However, if geeking out over bridges isn’t your thing, I think you’re really going to like the next stop!
19. Oberlin Bend
Mile Marker: 31.5
Oberlin Bend is a lesser-known spot along GTS road with some breathtaking views. It’s the last big bend before you’ll reach Logan Pass. But the best part about this stop is that it’s a mountain goat study area!
It’s highly likely that you’ll see mountain goats here. They like to hide in the pine trees along the boardwalk.

Parking here can be a bit tricky, but people don’t tend to stay for long so cars turn over fairly quickly if you’re patient.
This spot is also where the weather typically starts to get snowy and much colder. When I drove up to Logan Pass this is where I started experiencing blizzard conditions. The snow came down so fast and thick that visibility was extremely limited.
As you come around Oberlin Bend you’re reaching the highest point along Going To The Sun road, so it’s not only cold, but it’s also windy.
20. Highline Trail
Mile Marker: 32
Highline Trail is one of the most popular hiking trails in Glacier National Park, and for good reason! The views from this trail are out of this world.
While it’s a 15-mile trail, it’s possible to complete a smaller section of it.
On my visit to Glacier National Park I didn’t have enough time to complete the entire trail, but I did the first few miles (starting from Logan Pass) and it was worth it!
The first section of the trail is the most popular, and the most interesting. It’s challenging, but not because of significant elevation gain. Instead, the trail is narrow and follows the steep mountainside tightly.
There are sections where rope is hammered into the side of the mountain to keep you from falling.
In mid-September I encountered a lot of ice on the path. Additionally, the trail is so narrow that some sections cannot accommodate traffic in both directions, which causes some delays.

Regardless, the views and the experience are worth it! This is a must-do. If you’re short on time I recommend doing the first mile so you can still get the real Highline Trail experience.
Highline Trail, Logan Pass and Hidden Lake Overlook all make use of the same parking lot. You don’t need to find new parking to enjoy the next two stops on this list.
If you’re new to hiking, check out my beginner hiking gear guide to prepare for your trip.
21. Logan Pass
Mile Marker: 32
Logan Pass Visitors Center is the highest point on the road with stunning views and wildlife. It sits at an elevation of 6,647 feet and is located along the summit of the Continental divide.
In addition to being the trailhead for Highline Trail and Hidden Lake Overlook trail, Logan Pass also includes educational displays, park information, restrooms and a bookstore.
Plus, if you haven’t already gotten your National Parks Passport Book stamped, this is a great place to do so.
The parking lot at Logan Pass is large, but even so it gets packed by 8:30am during the summer months. Sometimes earlier.
I arrived here around 7:30am and the lot was already filling quickly. By the time I left mid-afternoon there were cars circling for up to an hour looking for a spot.
Note: There aren’t any food services at Logan Pass. There are very few options at all along Going To The Sun road so be sure to pack something to eat!
Pro Tip: If you cannot find a parking space at Logan Pass you can always park further along Going To The Sun road and take the shuttle back.
Shuttle stops nearby include The Loop (to the West) or Siyeh Bend, Jackson Glacier Overlook, St Mary Falls, Sunrift Gorge and Sun Point (to the East).
22. Hidden Lake Overlook
Mile Marker: 32
Hidden Lake Overlook trail is another must-do in Glacier National Park. If you’re feeling a bit more ambitious you can continue past the overlook and complete the entire Hidden Lake Trail, which takes you all the way down to the lake.
I did this hike in mid-September and it was one of my favorite hikes in Glacier National Park. (Grinnell Glacier, in Many Glacier, holds my top spot for favorite hike)
It starts off along a boardwalk through an alpine meadow. When I was there, the wildflowers were still in bloom but an early morning snowstorm had dusted them with snow – it was incredibly beautiful and serene.

The boardwalk leads to the overlook where you can look down over Hidden Lake, as well as views of Bearhat and Reynolds Mountain.
The hike is mostly flat up until this point. If you choose to hike down to the lake, like me, then you’ll start to have a challenging elevation change.
After hiking down to the lake, I ate lunch. Many people mentioned seeing moose along the lakeshore, but I was only able to spot fresh grizzly tracks.
While I was hiking Hidden Lake Trail I met a Park Ranger who told me that a guest had actually seen a wolverine hunt a moose in this valley! Wolverines are really rare to spot in the park.
23. Big Drift
Mile Marker: 32.3
Shortly after leaving Logan Pass you’ll drive through Big Drift. This isn’t a stop where you can get out, but it’s noteworthy for this list because of the weather patterns here.
Due to the elevation in this area, and the way the surrounding mountains funnel snow into it, Big Drift experiences a large amount of snow accumulation. Sometimes up to 80 feet!
This also makes it one of the most challenging areas along Going To The Sun road for crews to clear.
24. Lunch Creek
Mile Marker: 32.7
Lunch Creek is a popular spot for… lunch! Many park guests will pull off here and have a picnic lunch. Very creative naming, huh?
I think lunch is better on a hike, like Hidden Lake Trail or Highline Trail, but if you’ve opted to skip those this trip then this is a great alternative lunch spot with some beautiful views of the park.
25. East Tunnel
Mile Marker: 33.1
Next, you’ll pass through the East Tunnel, the second and final tunnel along GTS road. It’s also the longest tunnel, measuring 408-feet and passes through Piegan Mountain.
This tunnel was the most difficult challenge when constructing Going To The Sun road. It was built in 1931 and a 3.5 mile trail was constructed above the tunnel so building materials could be packed in, and then hauled down a series of ladders and switchbacks totaling 200 vertical feet.
Road crews worked 24 hours a day on the tunnel and were able to progress 5 feet each day.
26. Siyeh Bend
Mile Marker: 34.7
Siyeh Bend is the starting location for two popular day hikes: Piegan Pass and Siyeh Pass. It’s also an under appreciated section along Going-To-The-Sun road.
Builders had to fill in the gap below the road in order to provide structural support.
This is the point along Going-To-The-Sun road when the ecosystems change from higher elevation sub-alpine vegetation to forest.
27. Jackson Glacier Overlook
Mile Marker: 36.7
Jackson Glacier is the 7th largest glacier in the park. This is the best view of a glacier in the park possible to see from a vehicle – for everything else you’ll need to put on your hiking boots.
The glacier is 5.5 miles from the viewpoint. Over time it’s shrunk and is now split in two (Jackson and Blackfoot).
The formation of glaciers happens when there’s more snow accumulation over winter than snow melt during summer. Unfortunately, there’s more melt occurring now so the glaciers are receding.
At the end of the “little ice age” in 1850 it was estimated that Glacier National Park had 150 glaciers. By 1968 that estimate had dropped to approximately 50.
Today, there are 26 glaciers remaining. Based on current climate trends, scientists estimate that Glacier National Parks glaciers will be gone by 2030.
28. Gunsight Pass
Mile Marker: 36.7
Have you ever wondered what Glacier National Park camping is like? Gunsight Pass is your opportunity to backpack in Glacier, if that’s something that tickles your fancy. This hike is an 18-mile one-way hike from Gunsight Pass to Lake McDonald Lodge.
The route takes you across the continental divide, from Gunsight Lake to Gunsight Pass and past Sperry Chalet and Sperry Glacier.
Sperry Chalet is a great backcountry option for Glacier National Park lodging. It’s one of two remaining Chalets built in the early 1900’s by the Great Northern Railroad (as part of the companies strategy to entice train-riders to purchase cross-country tickets to see the park). The Chalet is only accessible by trail and provides a truly unique backpacking experience.
Note: Backpacking in Glacier National Park requires a permit.
29. St Mary Falls & Virginia Falls
Mile Marker: 38.9
These waterfall hikes are some of the more popular hikes in Glacier National Park and definitely worth doing.
Parking can be a bit tricky, but there are several roadside pull offs and a few parking lots along the Western side of St Mary Lake. Trails connect all of these so it’s possible to park a little further away and still gain access to this hike.
This trail hikes down to the valley floor. It’s a 2.4 mile round trip hike to St Mary Falls.

Hike a little further on and you’ll also find Virginia Falls. If you’ve added Virginia Falls to your route expect a 3.6 mile round trip hike.
Along the hike you’ll also see views of Little Chief and Dusty Star Mountain. This is a great location to jump in the water and cool off!
30. Sunrift Gorge
Mile Marker: 39.5
Sunrift Gorge is a fun stop with a short 200 foot trail to an overlook where you can see the gorge.
The gorge is 800 feet long and 80 feet deep – the narrowness of this gorge makes a unique microclimate that’s home to a few species not widely found in other areas of the park.
The Dipper, also known as a “Water Ouzel”, is the largest member of the sparrow family and can be found here. It’s named from the dipping motion it uses while hunting in the stream. This is a great spot to watch Dippers feed. It’s fascinating to watch them dive and swim in the water.
Sunrift Gorge is also the trailhead for Siyeh Pass, a 10.3 mile hike. Even if you don’t plan to hike the entire trail, it’s worth a trip up to Bering Creek, about 1 mile in, for great views of wildflowers and huckleberry patches.
Just remember!: Bears also love the huckleberries on this trail so you must always carry bear spray while hiking in Glacier National Park.
31. Baring Falls
Mile Marker: 39.5
From the same parking lot as Sunrift Gorge, you can take a short hike in the opposite direction to see Baring Falls. The hike is short (¼ miles to the falls) and follows an old horse trail.
The Baring Falls trail (technically Siyeh Pass to Piegan Pass trails) connects with the St Mary and Virginia Falls trails. If you’re planning to hike all three waterfalls I recommend starting here, then adding on St Mary and Virginia Falls.

32. Sun Point Nature Trail
Mile Marker: 40.4
Sun Point Nature Trail is a short 2 mile hike with great views of St Mary Lake.
Going-To-The-Sun Chalet, built by the Great Northern Railroad in 1915, used to sit here. It was an impressive swiss-style Chalet built as part of a network of chalets in the park to encourage railway travel out West.
Unfortunately, the chalet was closed during WWII and never reopened due to disrepair.
The nature trail also connects to St Mary Falls and Virginia Falls via Piegan Pass. If you aren’t able to find parking near St Mary Falls trailhead this is another option, with a much larger parking lot, to still be able to see the waterfalls.
Note: This is the farthest point accessible for vehicles over 21 feet heading Westbound. If your van or RV exceeds this length and you’re heading West, park here and take the shuttle!
33. St. Mary Lake and Wild Goose Island
Mile Marker: 42.9
Wild Goose Island is one of the most iconic views in Glacier National Park. It’s fascinating that this tiny island remains standing after glaciers carved out the rest of the lake around it.
From the lookout you face West, so this is a great place to catch sunset in Glacier National Park.

34. Golden Staircase Overlook
Mile Marker: 43.2
Golden Staircase Overlook is a large pull out along St Mary Lake with stunning lake views.
During construction of the road, the limestone cliffs here were a big challenge to construction crews. Ultimately, they blasted rock out of the mountainside and built a large retaining wall which is impressively 555 feet long and almost 30 feet high, built in 5 weeks in 1933, to support road traffic.
35. Rising Sun
Mile Marker: 43.9
Rising Sun is a great place for a picnic lunch or dinner. It offers great views of Saint Mary Lake.
Across the road is Rising Sun Campgrounds, which has a gift shop, camp store, basic groceries and a casual restaurant where you can pick up boxed lunches.
Glacier Park Boat Company offers boat tours of St Mary Lake, which leave from this location several times a day.
Note: Rising Sun Campgrounds is also the only spot in Glacier National Park which has showers available to the public. If may be worth a stop in here if your accommodations for the evening do not provide one. As I live in my van with limited water available, I’m always looking for more convenient shower options on the road.
36. Two Dog Flats
Mile Marker: 46.5
If you’re interested in wildlife spotting, Two Dog Flats is a great stop along Going-To-The-Sun road.
Animals that can be found here include coyotes, badgers, and deer.
Elk can also be found in the meadows, particularly in the winter months. If you’re visiting during the spring and summer you’re most likely to see Elk at dusk or dawn.
37. St Mary Visitors Center
Mile Marker: 49.5
This is the final Going To The Sun Road stop. St Mary Visitors Center is a great place to fill up your water bottle, use the restroom, and talk to a park ranger!
There is a large overflow parking lot at St Mary Visitor Center so if you have trouble finding parking at any of the other stops along Going To The Sun road you always have the option to come to the visitor center to park, then ride the free shuttle back into the park.
Brief History Of Going-To-The-Sun Road
The vision for Going-To-The-Sun road began in the early 20th century as a way to provide automobile access to Glacier National Park. At that time, automobiles were rising in popularity.
Construction for the road, originally named the “transmountain highway”, began in 1921.
It was a challenging project due to the rugged terrain and harsh weather conditions. The mountain is covered in up to 80 feet of snow for a large portion of the year.
Additionally, engineers hoped to retain the natural beauty of the landscape so explosives were used sparingly, which slowed construction timelines significantly.
The road was completed 11 years later, in 1932, opening up the heart of Glacier National Park to motorists starting in July 1933. However, it was not until 1952 that the entire road was paved.
In 1997, Going-To-The-Sun road was designated a National Historic Landmark, recognizing its historical and engineering significance.
There are a few engineering marvels along GTTSR which are quite impressive considering the limited resources and the time in which it was constructed.
For example, Triple Arches is a section along the road where there was no flat surface available, so a series of arches perched atop ledges jutting from the mountainside were used to create support for a bridge across the expanse.
11 Tips For Driving Going To The Sun Road
Many people wonder if Going To The Sun road is scary to drive. In my experience, no, and I did it in my camper van (which pushes every size restriction on the road).
However, I went in prepared, which I’m sure had an impact on my experience. Based on that, these are my best tips for driving Going To The Sun road in Glacier National Park.
1. Know Your Vehicle
It’s crucial to make sure your vehicle fits within the restrictions for length, height and width. There are hairpin turns on this road which require a sharp turning radius and a longer vehicle won’t be able to navigate.
Additionally, there are rock protrusions which will really mess up your car if you can’t pass underneath them because your vehicle is too tall.
And of course, the road is extremely narrow in some areas, so if you’re taking up more than your share of the road you’ll swipe oncoming traffic. This is the most important thing you need to prepare for prior to driving the road.
If you are planning to rent a car, I recommend you rent a vehicle you have experience driving.
If you’ve never driven a large SUV before then don’t rent that type of vehicle for this roadtrip.
The road is cleared and well-maintained while it’s open, so you won’t need 4 wheel drive or an extra large vehicle, a sedan is just fine for this trip.
If your vehicle is too large, consider parking it at the Apgar or St Mary Visitor Center and utilizing the free shuttle service instead.
2. Know Your Driving Skills
I don’t say this to scare you, but if you are not a confident driver then this is not the roadtrip for you. If it makes you very nervous to be on narrow, winding roads with extremely steep drop-offs then the shuttle may be a better option.
After driving this road, there’s a few important things I think everyone should know prior to getting behind the wheel.
First, there aren’t traditional guardrails. While there are short stone walls that line the road, they won’t give you much comfort given how low to the ground they are. In my opinion, these are pretty and not practical.
Second, there will be bad drivers – you can’t avoid it. I experienced a massive pick-up truck driving towards me with both of his wide rear view mirrors out – he had to have been at least 10 feet wide (which exceeds the 8 foot limit) and didn’t bother to pull his mirrors in.
Because the road is narrow, and I happened to be on the inside lane at that moment I was helpless to pull away from him (hello large mountain wall!). My point is, you need to be prepared for difficult terrain, and also for difficult drivers.
Given its popularity, Going To The Sun road is very busy. It has a lot of traffic. If you aren’t confident behind the wheel you could cause a massive issue on the road which will impact everyone’s enjoyment of it. Know your limits and just work within them – you’ll have more fun and so will everyone else.
All that said, don’t be overly intimidated. The majority of traffic goes slowly (25-30 mph) and there’s no ability to pass anyone so you’ll be more than ok if you can keep your car in the lane.
3. Be Prepared For Weather and Road Conditions
Weather on the mountain can change quickly, especially at elevation and near Logan Pass.
When I drove Going To The Sun road I started at Apgar with clear skies and by the time I reached Logan Pass I was in a blizzard so thick I couldn’t see more than 10 feet in front of me. In early September!
If you’re driving from West to East (per this itinerary), just after you pass Logan Pass you’ll enter an area called “big drift” – named because of the snow drift weather patterns that occur here and allow quite a bit of snow to accumulate.
Sometimes this area gets more than 80 feet of snow during the winter! You’ll know you’re in this area if you’ve passed Logan Pass but haven’t entered the East Tunnel yet.
Always check the weather forecast before you head out.
Additionally, be prepared for changing road conditions. Because of the harsh conditions, Going To The Sun road requires constant maintenance to keep it in good condition. With such a short season for construction, you’ll likely be impacted by some form of road construction during your visit.
Glacier National Park does a great job at announcing planned maintenance ahead of time, and keeping visitors informed. You can check the latest road conditions here.
4. Fuel Up Before
There are no gas stations along Going To The Sun road so you want to fill your gas tank before you enter Glacier National Park.
While it’s only a 52 mile route, you want to be prepared with extra gas incase of traffic or delays.
My rule of thumb (especially in remote areas): if my tank is half full, it’s empty – time to refill.
5. Start Your Drive Early
This is my biggest tip, especially for any nervous nelly drivers. I started driving Going-To-The-Sun road before sunrise and had the road to myself for a large portion of it.
In fact, the only other cars on the road were all headed the same direction as me, so I didn’t need to worry about oncoming traffic (which allows you to hug the middle of the road in more precarious sections).
By getting an early start you’ll also avoid crowds and have an easier time finding parking. Plus, the sunrise over the mountains is one of the most beautiful things I’ve ever seen in my life.
In fact, if you can make it to Big Bend right before the sun peaks you’ll catch the most insane sunrise colors across the valleys.
An early start also means you can squeeze more into your day, which is important because there’s a TON of Going To The Sun Road stops on this itinerary you can’t miss.
6. Drive From West To East
While it’s possible to drive in either direction on Going To The Sun road, I personally think West to East is the best route. This is the route I drove, too.
The section of GTTSR between West Entrance and Logan Pass (the western half of the road) is the most challenging. This is the section where you’ll see the steepest drop-offs, tightest turns and narrowest sections of road.
By driving West to East you’ll position yourself on the inside section of the road at The Loop (the sharpest hairpin turn). Keep in mind that this turn will be sharpest for West to East traffic, and have a little more turning radius for travelings heading East to West (from St Mary towards Apgar).
For a majority of the drive, eastbound traffic will be the outside lane, closest to the steep drop-offs. This can be nerve wracking for passengers who can’t see any ground below them out their windows.
Westbound traffic mostly follows the side closest to the mountain, which may seem a bit less scary, but it gives you a lot less flexibility to maneuver. There are a few areas where the rock protrusions hang low so you absolutely cannot exceed a 10-foot tall vehicle unless you’re hoping to turn your vehicle into a convertible.
By driving eastbound (following this itinerary), you’ll also avoid some crowds if you start early in the day. They’ll mostly be behind you because they chose to sleep in and battle for parking spaces later in the day 😂.
7. Food and Facilities
There are limited food and bathroom options while driving Going-To-The-Sun road. Actually, there’s far more opportunities to use the restroom than there are to get a snack, so I highly recommend packing a cooler with some day hiking food.
As far as restrooms go, most of the trailheads have facilities, as well as the campgrounds along the route. Additionally, Apgar Visitors Center, McDonald Lodge, Logan Pass, and St Mary Visitor Center have bathroom facilities.
Bathroom stops along Going-To-The-Sun Road (from West to East):
- Apgar Visitor Center
- Lake McDonald Lodge
- Avalanche Creek
- Logan Creek
- The Loop
- Big Bend
- Logan Pass
- Jackson Glacier Overlook
- Sun Point
- Rising Sun Boat Dock
- Rising Sun
- St Mary Visitors Center
All of these bathrooms are added to the Going To The Sun Road map (above). I recommend downloading this map ahead of your trip and referencing it as needed.
8. Plan For Enough Time
It will take a minimum of 2 hours to drive Going To The Sun road – that’s without stops. Most people take at least 4 hours, but to really see it I suggest you plan for an entire day (sunrise to sunset).
There are so many great hikes in Glacier National Park that start along Going To The Sun Road, so be sure to fit these into your itinerary for Glacier National Park.
During my trip to Going To The Sun road I started before sunrise, and ended after sunset and still felt like there was more to see!
9. Wildlife In Glacier National Park
Be prepared for wildlife encounters on Going To The Sun Road! Particularly near Logan Pass.
There’s hundreds of species that live in the park. While driving you may see bears, bighorn sheep, elk, and mountain goats.
While sightings are far less common, some rarer species live in the park, such as mountain lions, lynx and even wolverines.
Please do not ever stop on the road to watch or photograph wildlife. There are many pull-offs you can utilize so you don’t hold up traffic or cause an accident.
You may even want to pack binoculars! Many times during my trip there were mountain goats you could kind of see from the road, but with my binoculars I was able to get a much better view!
10. Pace Yourself
The best way to plan for driving Going To The Sun road is to know which stops you absolutely must see, and which stops you’d like to see if time allows. When I plan, I call these my A-list (have to do it) and B-list (would be so happy if I had extra time to do these).
In this article, I’ve outlined all of the best stops along Going To The Sun road. I recommend reading through these and coming up with your A-list and B-list stops, and then building an itinerary that includes everything on your list.
If you’re staying in the park for more time, consider prioritizing items in the middle of GTTSR because items on the East and West sides are easier to see on other days when you’ll be in those areas (also – check out my 3 day itinerary for Glacier National Park)
11. Be Prepared For Emergencies
I believe that the more prepared I am for something bad to happen, the less likely it is to occur.
For that reason I always travel with a well-stocked first-aid kit in my camper van – this first-aid kit is particularly great because not only does it have everything you need, it also has a portable mini kit that I use for my hiking and backpacking trips.
Items you definitely need in your car before you drive Going To The Sun road include:
- First-aid kit
- Blankets
- Water
- Snacks
- Downloaded maps (or paper maps)
- Flashlight or lantern
It’s not uncommon to experience construction delays while driving GTTSR, so water and snacks are a good idea. Accidents can shut the road down for hours, as there’s no ability to detour because of the roads narrowness.
And just in case you have car trouble, especially after dark, you’ll want a flashlight or lantern to help you see or fix the problem. A flashlight is also a great way to signal for help. Please do not rely on your cell phone flashlight – you need to conserve your battery.
There is no cell service along Going To The Sun road so be sure to download your maps ahead of time or to bring with paper maps (although GTS is a straight shot so it’s unlikely you’ll get lost).
Check the National Park Services website for alerts on road closures
FAQs – Going To The Sun Road
Vehicle Size Restrictions Going To The Sun Road
Vehicle size restrictions along Going To The Sun road require vehicles to be less than 21 feet long, 8 feet wide and 10 feet tall between Avalanche Campground and Rising Sun picnic area.
Both of these locations are part of the free shuttle system at Glacier National Park, so you’re able to park your oversized vehicle here and take the shuttle further into the park.
Can You Drive Through Glacier National Park?
Yes, you can drive through Glacier National Park. There is only one interior road that connects the East and West sides of the park – Going To The Sun road.
Going To The Sun road is only open during summer months (usually late June through early October) and may require a reservation. You can read more about how to get Going To The Sun Road tickets here.
Is There An Alternative To Driving Going To The Sun Road?
Yes, instead of driving Going To The Sun road you can participate in a tour. Red Bus Tours provides a guided, driven tour along Going To The Sun road.
Alternatively, you can get from one side of the park to the other by taking Route 2, which takes the same amount of time – approximately 2 hours – and follows the southern perimeter of Glacier National Park. This road is open year-round and does not require a vehicle reservation.
Final Thoughts: Going To The Sun Road Stops
Going To The Sun Road is full of incredible stops, scenic overlooks and amazing hikes. It’s one of the most scenic roads I’ve driven to date (and as someone who lives in a campervan I’ve seen quite a few!)
The best stops on Going To The Sun Road you don’t want to miss are Weeping Wall, Big Bend, Oberlin Bend and Wild Goose Island.
I also highly recommend making time to hike Avalanche Lake, Hidden Lake, Highline Trail and St Mary & Virginia Falls.
Before you drive, make sure you have the following:
- Park entry fee
- Vehicle reservation
Continue planning your trip to Glacier National Park with these additional guides: