Guide To Hiking Grinnell Glacier In Glacier National Park
If you’re headed to Glacier National Park you’ll definitely want to add hiking Grinnell Glacier to your itinerary. It’s my favorite trail (ever! in the whole world!) and has so much to see.
Don’t let the distance or elevation gain scare you off – it’s a moderate incline for a majority of the trail and anyone can do it!
In this guide I’ll give you an idea of what to expect on the Grinnell Glacier trail as well as my own personal experience on this hike.
I’m so excited for you to experience Glacier National Park! It’s truly one of the most scenic places I’ve visited with some of the best hikes on the planet.
In this article:
- Grinnell Glacier trail details
- What to expect + my own experience
- How to get to Grinnell Glacier trailhead + parking tips
Disclaimer: This article features some affiliate links. I only endorse things I’ve personally used or that come highly recommended by trusted peers. If you purchase anything I mention using my referral links from Amazon, REI or other retailers I may receive a small commission. However, there is never extra cost to you. You can read more here. Thank you for your support.
Glacier National Park Overview
✈️ How To Get There: Fly into Glacier Park (30 min), Missoula (2.5 hr), or Bozeman (5.5 hr)
⛰️ Glacier Must-See: Going-To-The-Sun Road, Avalanche Lake, & Highline Trail
💵 Entrance Fee: $35 or free with an America The Beautiful Pass
🛌 Where To Stay: Lake McDonald Lodge (West side) or Many Glacier Hotel (East side)
TIP: I recommend booking your rental car with Discover Cars. They search across the major rental companies to find the best rate and let you cancel for free up to 48 hours before pickup, so you can grab a good rate now without stressing if your plans change.
Overview: Hiking Grinnell Glacier Trail
Distance: 10 miles
Elevation Gain: 2,047 feet
Difficulty: Hard
Parking: Grinnell Trailhead, Alternative options at Swiftcurrent Motor Inn and Many Glacier Hotel
Highlights: Grinnell Glacier trail passes several beautiful lakes before ascending up towards Grinnell Glacier. Along the way you’ll see breathtaking panoramic views of the park, including a birds eye view of Lower Grinnell Lake.

Read this travel guide & itinerary for Glacier National Park
How To Get To Grinnell Glacier Trailhead + Parking Tips
There are two hikes to the glacier: Grinnell Glacier Trail and Grinnell Glacier Overlook. While they both go to, generally, the same area in the park they start in different areas.
Grinnell Glacier Trail is 10 miles. The trailhead is located in Many Glacier, near Swiftcurrent Lake and the hike takes you right up to the base of Grinnell Glacier.
Grinnell Glacier Overlook is 11.4 miles and almost double the elevation gain of Grinnell Glacier Trail. The trailhead starts at The Loop, one of the stops along Going-To-The-Sun Road between Apgar Village and St Mary. This trail brings you to an overlook above the glacier.
This guide covers Grinnell Glacier Trail only.
Personally, I think Grinnell Glacier Trail is the better hike because you’ll be able to walk right up to the glacier. Additionally, the scenery along the entire trail is stunning.
Grinnell Glacier Trail is one of the best hikes in Glacier National Park.
Grinnell Glacier Trail Parking
There is only one road to the Grinnell Glacier Trailhead. You’ll enter Glacier National Park through the Many Glacier entrance and continue along Many Glacier Road (RT-3) for about 7 miles.
There are several hotels in Glacier National Park in this area. If you’re staying at one of them you’ll be conveniently located next to several incredible hikes. The best part is you can walk to them, so you won’t have to battle for parking.
Just after you pass Many Glacier Hotel and Swiftcurrent Lake (both on your left) you’ll see a small parking area on the left side of the road. This is the trailhead for Grinnell Glacier Trail and Swiftcurrent Nature Trail.
There are only about 40 official parking spaces in this lot. You’re also able to parallel park along the loop which might create space for another 20-30 cars.
Given that this is one of the most popular hikes in Many Glacier it’s a busy spot, and parking can be really hard to find if you are arriving after 7am.
Luckily, there are two other large parking lots in Many Glacier nearby.
Swiftcurrent Motor Inn is about a quarter mile farther down RT-3 and has a large parking lot.
Many Glacier Hotel is about a mile back down RT-3 and has the largest parking lot in Many Glacier.
If you park at the hotel, you don’t need to walk back down the road to the Grinnell Glacier Trailhead.
Instead, head south from the parking lot towards Swiftcurrent Nature Trail and follow it along the eastern shore until you get to the Swiftcurrent Lake dock on the south end of the lake where you’ll be able to connect to the Grinnell Glacier Trail.

NOTE: If you are camping in Glacier National Park at Many Glacier Campground you will be close enough to walk to the trailhead.
Grinnell Glacier Trail Map
Grinnell Glacier trail is a fairly well marked and easy trail to follow. There are a few forks early on as the trail works around Swiftcurrent Lake and Lake Josephine – stay to the right at each of these.
Once you pass Lake Josephine, the trail starts to head uphill. You’ll see Lower Grinnell Lake below you as you walk up towards Grinnell Glacier and Upper Grinnell Lake.
During warmer months you’ll also catch a view of Grinnell Falls, between Upper and Lower Grinnell Lake.

My Experience Hiking Grinnell Glacier Trail
Grinnell Glacier trail is my favorite hike to date. I hiked this trail alone, but being that it was early September and less than a week past peak season there were enough other hikers on the trail that I felt safe in Glacier.
One downside to traveling alone and being a solo hiker is that you’re always making sure there’s at least two other parties on the trail within shouting distance, just in case something happens.
The day prior I hiked Avalanche Lake and Hidden Lake Overlook Trail. I had the same experience with those hikes – not crowded, but enough hikers around that I never felt unsafe.
Parking was easy enough to find at the primary trailhead parking lot around 8 am and I was on the trail by 8:30 am.
I recommend if you’re visiting between July and early September you should aim to arrive before 7 am.
The trail starts out along Swiftcurrent Lake. For the first two miles it’s shaded and mostly flat with a soft pine floor and a few stumps and roots to walk around.
About 1 mile in you’ll pass the dock along the south shore of Swiftcurrent Lake. The trail forks here.
If you stay left and keep following the lakeshore it’ll take you to Many Glacier Hotel (a good option for after you hike – they have lots of good restaurants for lunch).
To stay on Grinnell Glacier Trail you’ll keep right and head towards Josephine Lake.

Less than a quarter mile past the fork you’ll come upon Lake Josephine. I swear, the lakes along this trail just get more incredible as you hike!
Lake Josephine boat dock will be on your left as you keep to the right of the lake. The trail gets a little narrow here, which can make it a bit congested when there are oncoming hikers.
I didn’t have any oncoming hikers on my way out (because it was early), but it was a bit more of a challenge on the way back to the trailhead. Another good reason to start early!
After the first two miles, having passed Swiftcurrent Lake and Lake Josephine, the trail starts to split to the right and gain elevation as you head towards Grinnell Glacier.
The view from this portion of the trail was one of the most beautiful places I’ve ever seen.
From the trail, I looked down and could see lower Grinnell Lake, Lake Josephine (closest lake in photo) and Swiftcurrent Lake (farthest lake in photo) all nestled in a line between the mountains. This photo doesn’t do it justice.

During the summer, Glacier National Park waterfalls are in full force and you have a good chance of seeing the Grinnell waterfall as melting snow from the upper lake next to the glacier overflows down the mountain into lower Grinnell Lake.
In September, when I hiked this trail there wasn’t much of a waterfall remaining, but you could still see a small stream flowing.

The trail along this part is carved into the mountainside. There’s not much shelter from the sun or wind. This was my favorite section of the trail – it’s challenging enough to be interesting and the views are unbelievable.
The trail flattens out for a short period before the final push to the glacier. It’s short lived, but the trail does hit as much as 30% incline with some rock steps in the last half mile.
It’s a bit of a challenge, especially when the trail gets more crowded, but it’s feasible if you take it at your own pace.
On the way up there were no crowds, but by the time I was coming back down this section of trail was getting congested while hikers waited for others to pass.
I had planned to eat lunch at the glacier, but after a few bites of my sandwich I realized it was just way too cold and windy for me to stay there so I backed down to the tree line, about a quarter mile back down the path.
Along the tree line, there’s also a pit toilet and a few benches to sit on. There were a few other hiking groups having lunch in this area as well.

I made great time on this hike because of the early start and lack of crowds. The trail is fairly narrow in spots and by the time I came back down the path there was some backup building.
In total, I spent just over 4 hours on this hike.
Grinnell Glacier Hike With Boat
If you’re interested in shaving some miles off the hike to Grinnell Glacier you can take the boat shuttle.
It’s actually two boats. The first crosses Swiftcurrent Lake and drops you off at the southern end. From there it’s a quarter mile walk to Lake Josephine where you pick up the second boat.
Personally, I don’t think the boat shuttle is worth it.
Realistically, it’ll only save you 2 miles of hiking (4 miles round-trip), and this portion of the trail is the easiest. It’s flat, follows the shoreline closely and is quite beautiful.
Additionally, taking the shuttle means you’re limited to the boat schedule, which doesn’t give you much flexibility to linger at the scenic overlooks along the hike.
The boats book out months in advance, so I recommend booking as far in advance as possible.
When To Hike To Grinnell Glacier
The best time to hike to Grinnell Glacier is during the summer months. During the winter, the weather conditions can be difficult to navigate, and it’s more likely the trail will be closed.
Summer Months (July to September): This is the most popular time for hiking to Grinnell Glacier. The trails are usually clear of snow, and the weather is more predictable, offering warmer temperatures and clearer skies. You’ll also see Grinnell Falls at its peak.
Late Spring and Early Fall: These times can also be suitable for hiking, but trail conditions can be more variable. Snow and ice may still be present on the trails in late spring, and early fall can bring colder temperatures and the possibility of early snowfall. Be prepared with winter hiking outfits and layers.
I hiked Grinnell Glacier in early September and while there was no snow on the trail, the wind was so cold that hats and gloves were necessary.

Tips For Your Hike
I recommend getting an early start for two reasons: this trail is 10 miles long so it takes a good portion of the day to complete, and it’s popular so the trailhead parking can fill before 8 am.
Even in the off-season the trailhead parking lot was almost full when I arrived around 8 am.
Proper gear is really important on this hike. The last 2 miles or so are very windy with little shelter from the elements.
I wore a hat, gloves, ear warmers, and two jackets just to stay warm in September. It’s really the wind, more than the temperature, that’ll get you on this hike.
If you’re new to hiking, check out my gear guide for beginner hikers to prepare for your trip.
Bring binoculars. The Grinnell Glacier trail follows several lakes, so from the trail above you may be able to spot bears or moose drinking from the lake.
Towards the glacier it’s also likely you’ll spot bighorn sheep on the cliffs. They blend in really well, so you have to look closely!

Hiking poles and traction devices may be a good idea. There was no snow when I hiked so traction devices weren’t necessary, but this trail has the potential to get pretty icy (especially towards the glacier) and it follows tightly along the steep mountainside so you definitely don’t want to slip.
I have found that hiking poles really help with steeper elevation because they take the load off my knees and helps me feel more secure in my footing so I can hike faster.
There’s a bathroom at the trailhead – it’s actually pretty nice as far as wilderness bathrooms go! There’s also a (less nice) pit toilet near the glacier (by the treeline).
While there is quite a bit of vegetation along the path, and easy spots to find some privacy in the first few miles, there’s absolutely nothing private for the last 2 miles before you reach the glacier and the second pit toilet.
If you’re someone who needs frequent pit stops I recommend getting strategic about your timing. Once you start ascending up to the glacier away from Lake Josephine the trail becomes very exposed.
Bring bear spray. Estimates show 300 grizzly bears and 600 black bears in Glacier National Park, and Many Glacier is their prime habitat. While it’s not likely you’ll see one on the trail, it’s always important to be prepared.
If you do not have bear spray, it’s possible to rent it from Glacier Outfitters in Apgar Village.
Most hotels and vacation rentals have bear spray available for guests, too, so be sure to ask when you check-in.
Unfortunately, this isn’t a dog friendly trail, but there are many great hikes for dogs near Glacier National Park!
What To Pack For Your Hike
Aside from the basic’s, there are a few things I think you should bring with you when hiking to Grinnell Glacier.
- Traction device
- Trekking poles
- Kula cloth
- More winter gear than you think you’ll need
- Wind breaker
- Snacks
- Bear spray
FAQs About Hiking Grinnell Glacier Trail
Below are answers to common questions about Grinnell Glacier hike in Glacier National Park.
Where is the Trailhead for the Grinnell Glacier Hike
The trailhead for Grinnell Glacier hike is located in Many Glacier near Swiftcurrent Lake. Route 3 is the only road into Many Glacier. The trailhead is located to the left just after you pass the lake.
A little further past the trailhead to Grinnell Glacier Trail is Many Glacier campground and Swiftcurrent Motor Inn. If the parking lot for the trailhead is full, consider driving a little further West and using one of the larger overflow parking lots. These are only half a mile down the road, or about a 10-minute walk.
Alternatively, you can park at Many Glacier hotel, which is on the opposite side of Swiftcurrent Lake, and take the Swiftcurrent Nature Trail clockwise to meet up with the Grinnell Glacier trail at the south end of Swiftcurrent Lake near the boat dock.
How Hard Is Grinnell Glacier Hike?
Grinnell Glacier hike is rated as hard, primarily because of its length (10 miles). While it does have just over 2,000 feet of elevation gain, it’s fairly evenly spread out across most of the hike, which makes it less strenuous.
Anyone in decent shape without mobility issues can accomplish this hike.
The first two miles of the hike are flat, and a great warm up. From there the trail steadily increases in moderate elevation gain. The final quarter mile has some steep sections, but they are short and manageable.
How Long Does It Take To Hike Grinnell Glacier Trail?
The total time it takes most people to hike Grinnell Glacier is around 5 hours. I spent just over 4 hours hiking, and around 5 hours in total on the trail (including breaks and lunch).
It’s easier to hike the trail when it’s not crowded, as some sections of trail are quite narrow and won’t allow multiple parties to pass at the same time. This leads to a bit of a traffic jam that can increase time on the trail.
Is Grinnell Glacier Trail Dangerous?
It is possible for Grinnell Glacier trail to be dangerous, but for the most part it is safe. The trail climbs to high elevation, so it tends to be covered in snow or ice long into the summer season.
While this is dangerous for slips or falls, it’s compounded by the fact that the trail tightly hugs the cliffside for a few miles, which can lead to more dangerous accidents if you lose your footing.
It’s important to bring the proper gear, like traction devices and trekking poles.

Like all trails in Glacier National Park, bear encounters are possible on Grinnell Glacier trail. It’s important to bring bear spray and know how to use it.
Where to Stay Near The Grinnell Glacier Hike
There are several lodging options in Many Glacier, including Many Glacier Hotel, Swiftcurrent Motor Inn and Many Glacier campground. Options immediately outside the park are limited. The closest town with accommodations is Babb, Montana.
Hikes Near The Grinnell Glacier Hike
There are many great hikes in Glacier National Park near Grinnell Glacier hike. Additional hikes in Many Glacier include Piegan Pass, Swiftcurrent Nature Trail, Redrock Falls, Ptarmigan Tunnel, Apikuni Falls, Cracker Lake, Swiftcurrent Pass and Iceberg Lake.
Keep Planning Your Trip To Glacier National Park
Use these resources to continue planning your Glacier National Park trip!
- The Best Itinerary For Glacier National Park: Day-By-Day Guide + Map
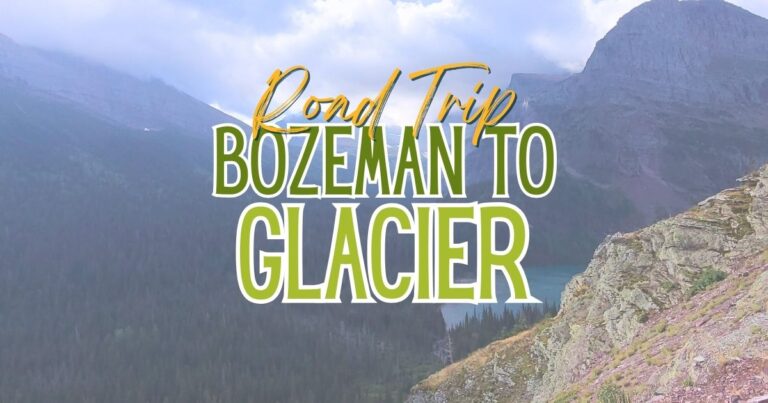
- Bozeman to Glacier National Park Road Trip
- 37 Best Going To The Sun Road Stops You Must See
- 21 Best Hikes In Glacier National Park For Every Skill Level
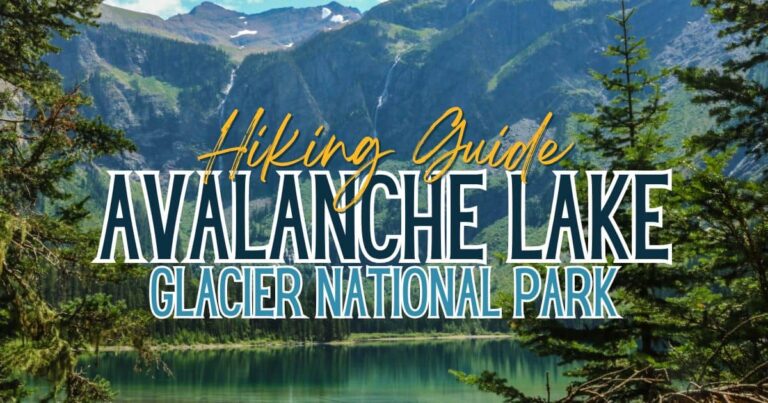
- Hidden Lake Overlook Trail – Glacier National Park
Travel Planning Resources
These are the resources I use and recommend for planning your next trip:
Accommodations: Expedia (hotels), VRBO (vacation rentals)
Flights: Skyscanner
Rental Cars: DiscoverCars and Outdoorsy
Tours & Excursions: Viator and GetYourGuide
Travel Insurance: SafetyWing
Credit Card With Travel Points: Chase Sapphire Preferred